|

 Up
Up
 Making the
Not Quite
Wright Kite

(You are here.)

  Need
to Need
to
find your
bearings?
Try
these
navigation aids:
If this
is your first
visit, please stop by:
Something
to share?
Please:
|
|
Available in Française, Español, Português, Deutsch, Россию,
中文,
日本, and others.
Wilbur made his scientific kite from pine and covered the frame
with cloth. The finished kite was fairly heavy and required a
strong wind to fly. It also took Wilbur quite a while to build — he
had to cut the wood to size and sew the fabric to the frame.
By using different materials, you can cut down on the weight and
the construction time. We made a kite similar to the “Wright Kite”
in just an hour or two using bamboo skewers, trash can liners,
and other stuff you can find at a grocery store. Because these materials are very light, our “Not Quite Wright Kite”
will fly in a gentle breeze.
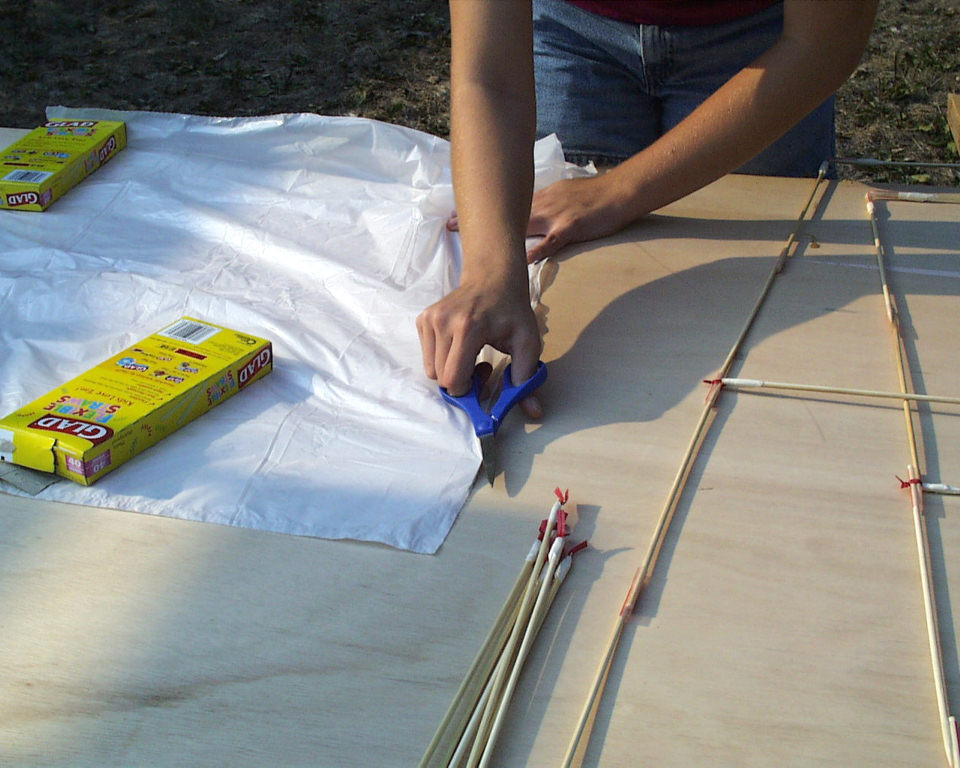
Gather your tools and materials. You’ll need:
- 30 skewers
- 20 twisty-ties
- 12 flex-straws
- One 13-gallon (“tall kitchen") trashcan liner
- Kite string
- Some tape (Either masking tape or cellophane tape will do.)
- 8 to 10 spring-activated clothespins
|

|
|
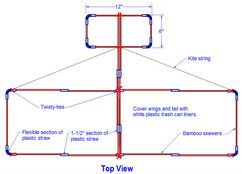
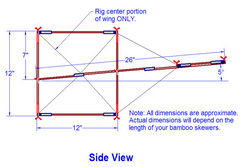
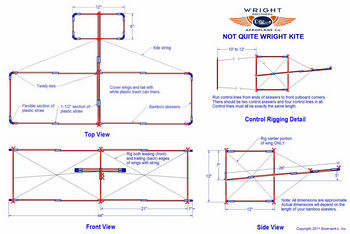 To
download an engineering drawing (in PDF format) that includes all
the information in the drawings above, right click on the image to
the left and save it to your hard drive. To
download an engineering drawing (in PDF format) that includes all
the information in the drawings above, right click on the image to
the left and save it to your hard drive.
|
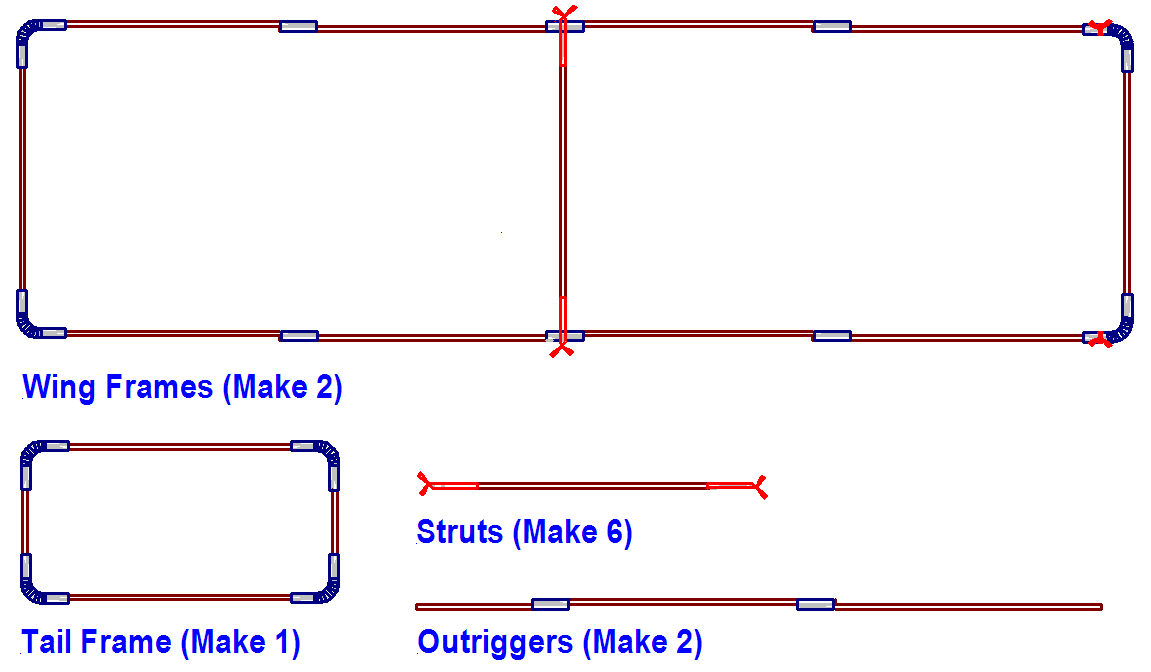
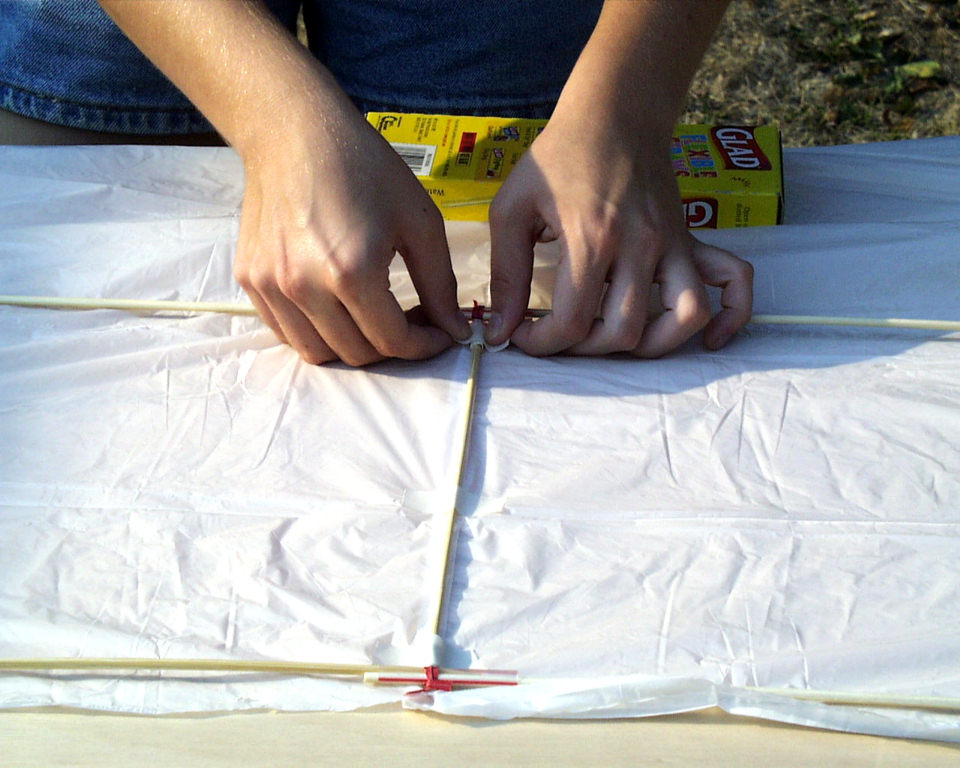
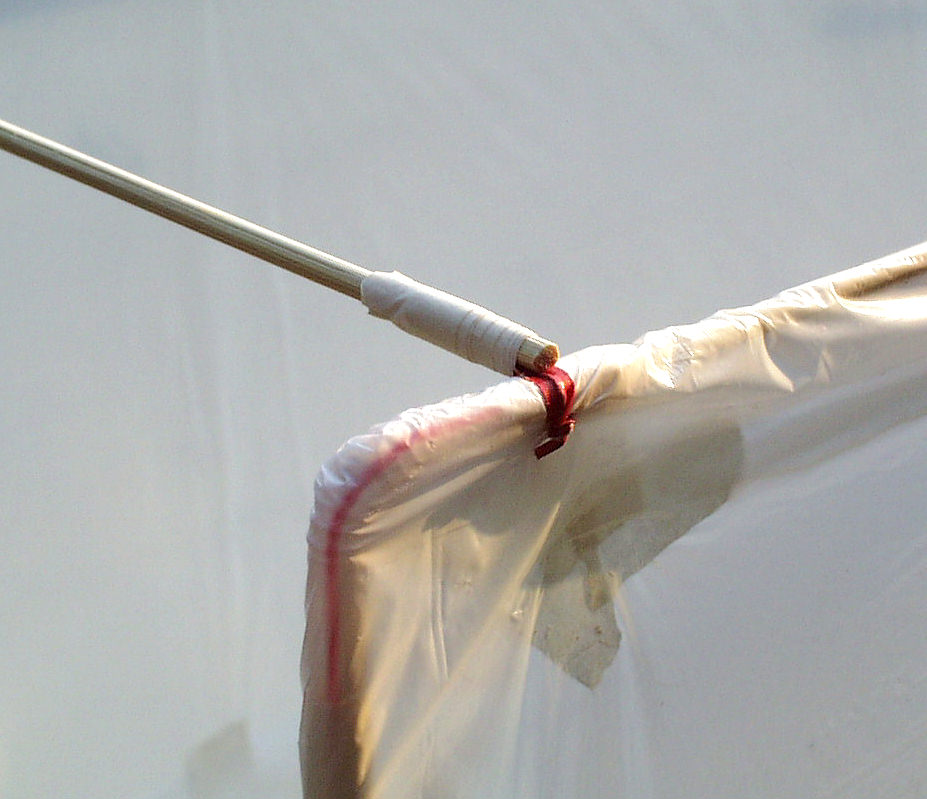
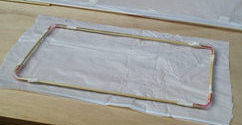
Assembling the wings
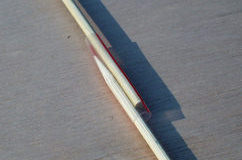
1. Make four wing “spars” — the long pieces — by joining four
skewers. Cut 1-1/2-inch lengths of straws, then insert the blunt end
of one skewer into a straw section from one end and the pointed end
of another skewer into the other end. Push the skewers so they
overlap one another about 1 inch into the straw section.
2. Join the spars with more skewers — "ribs" — to form two
long rectangular frames. To make each corner, use the flexible section of a
straw. Insert the spar in one end and a skewer in the other, then
wrap the connections with tape.
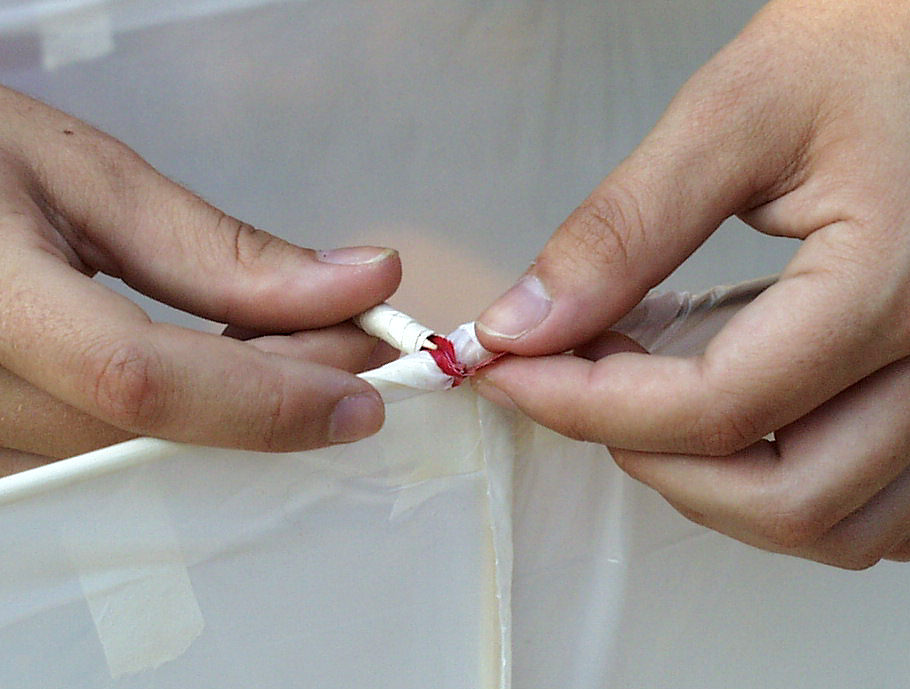
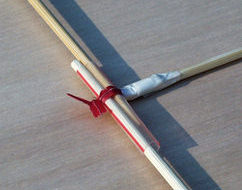
3. Add a “rib” — a single skewer — in the middle
of each rectangle to strengthen the frame. To do this, tape a
twisty-tie to each end of the skewer. Fold the ties in two and position
them so the ends protrude about 1/2 inch past the ends of the skewer.
Place the rib between the spars, wrap the ties around the spars, and
twist them together.
4. Make a small rectangular frame for the tail. Break a skewer
in half, then join the halves to two unbroken skewers with flexible
straw sections to make a rectangle. Tip: To break a skewer
cleanly and accurately, score it with a utility knife first.
5. Make the struts exactly the same way you made the middle
ribs in the wings frames — tape a twisty-tie to each end.
6. Cut a skewer in half. Then make the outriggers that
support the tail by joining two and one half skewers with lengths of
straws.
|
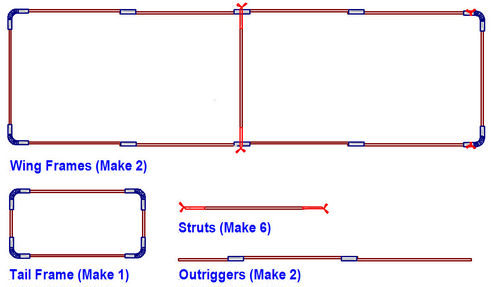
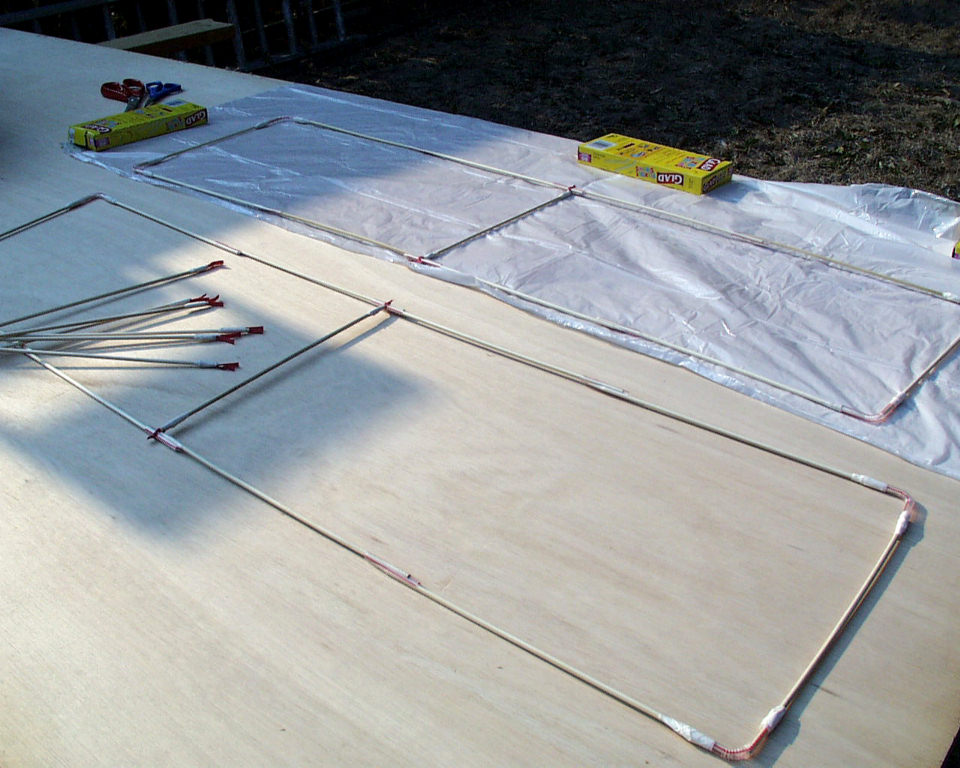
Begin by making four subassemblies –
wing frames, tail frame, struts, and outriggers.
|
To create long lengths, join skewers end to end with short sections
of straws.
To make the wing ribs and struts, tape folded twisty-ties to the
ends of the skewers.
|
To make a corner, insert the ends of the skewers in a flexible
length of strawd hold them in place with tape.
Attach the middle ribs to the wing frames by twisting the ties
around the spars.
|
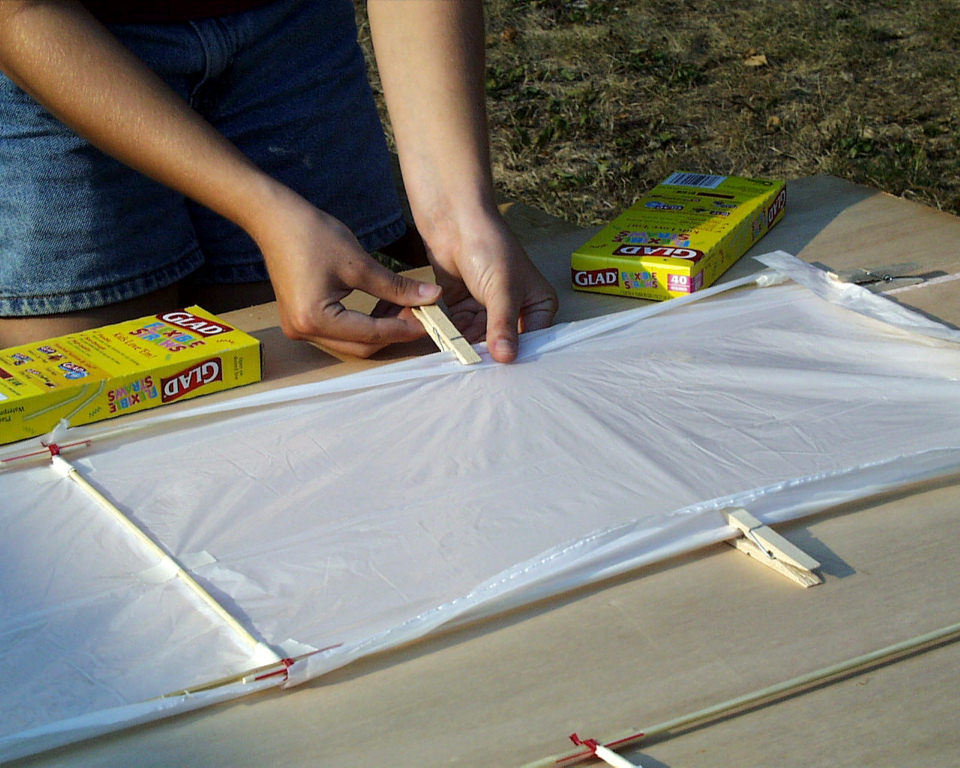
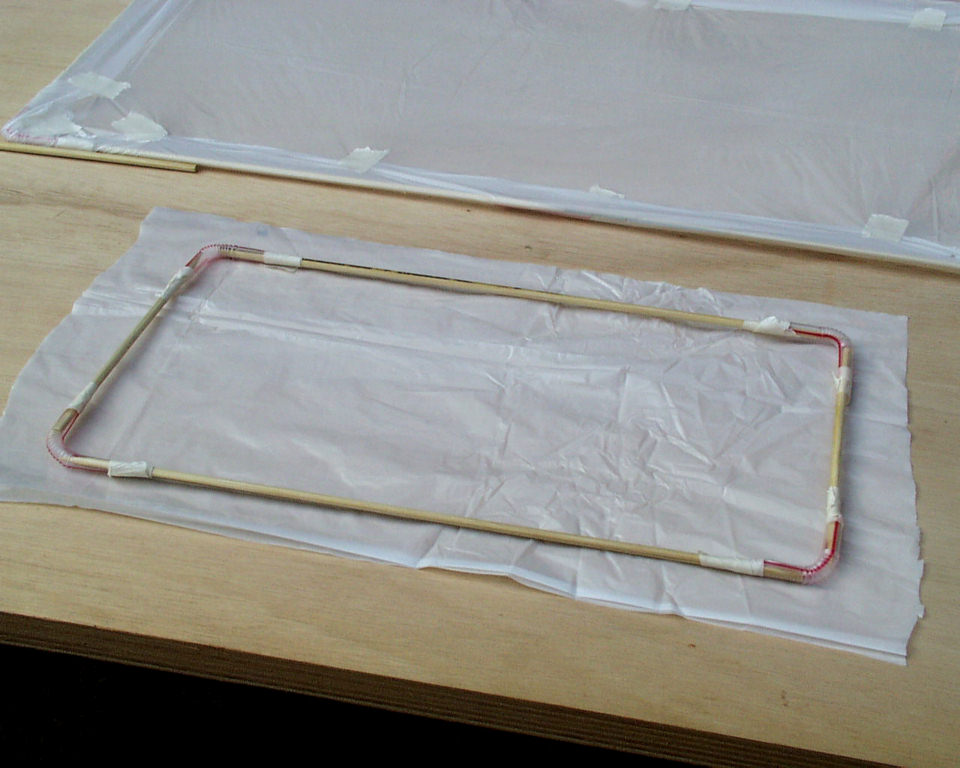
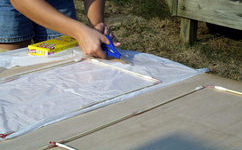
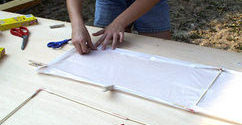
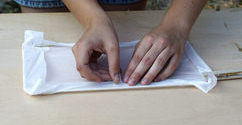
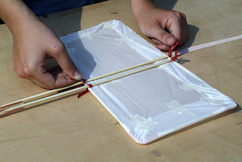
Covering the wings and tail
7. Unfold the trash can liner and slit the sides. Do not cut the
bottom seam. Unfold the liner to make a long strip of plastic, then
cut that strip in half down the length. This should make two plastic
sheets, each just a little longer than you need to cover the wing
frames.
8. Lay the wing frames on the plastic. Align the bottom
seam of the liner with the middle wing rib in each frame and tape
the liner to the rib. Trim the plastic sheets so they
are about 1 to 2 inches longer and wider than the frames.
9. To cover the wings, fold the plastic around the skewers and
hold it in place with clothespins. Then tape the folds. You’ll find
it easiest to start in the middle of each wing and work your way out
to the ends. Place a piece of tape at least every 3 inches all
around each wing frame. As you work, keep the wing covering taut
enough to appear smooth, but not so tight that it causes the frame
parts to bend. The kite will work just fine if the wing covering is
a little loose. 10. One of the scraps of plastic that you
trimmed from the ends of the trashcan liners should be large enough
to cover the tail frame. As with the wing coverings, cut the tail
covering 1 to 2 inches longer and wider than the tail frame. Fold
the edges of the covering around the frame, clamp it in place, then
tape the folds. Once again, keep the covering taut but not tight. |
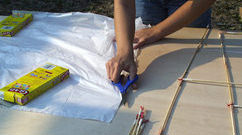
Cut the sides, but not the bottom, of the liner using scissors or a
utility knife.
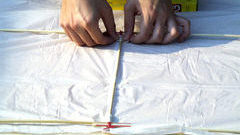
Position a wing frame on the plastic and tape the middle rib to it
to keep the frame from shifting.
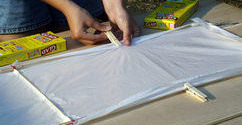
Fold the plastic over the frame and clamp it in place with
clothespins.
Cut a piece of plastic a little larger than the tail frame.
|

Unfold the liner and cut it in two lengthwise. Each piece should be
a little wider than the wing frames.
Trim the plastic so it overlaps the frame by about 1 inch all around
the circumference.
Tape the folded edges of the plastic sheet to the underside of the
wing covering.
Clamp and tape the covering to the tail in the same manner you
covered the wings.
|
Assembling the wings and struts
11. Cut tiny holes in the wing
covering where you will attach each strut. Spread the ends of the
twisty-tie on the strut part slightly, then insert one end of the tie through
a hole, wrap both tie ends around the spar and
twist them together. Repeat, attaching all six struts to the wings
to form a box.
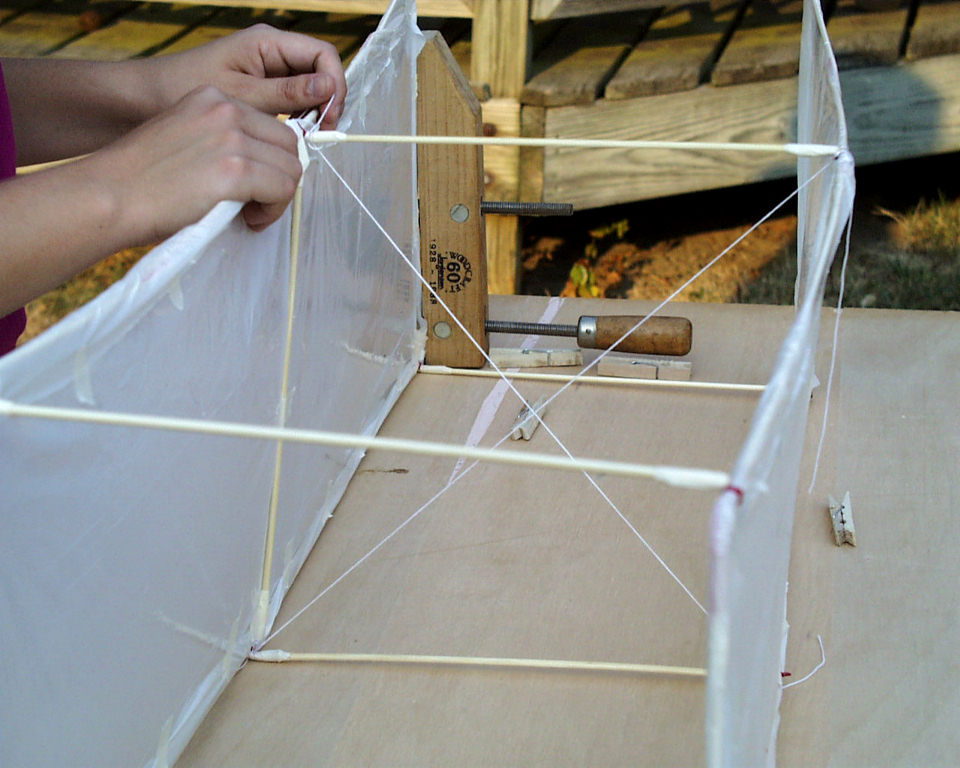
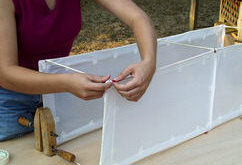
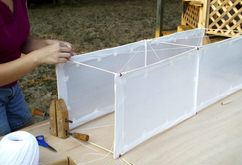
12. To fly properly, the box must hold its shape in the air, all
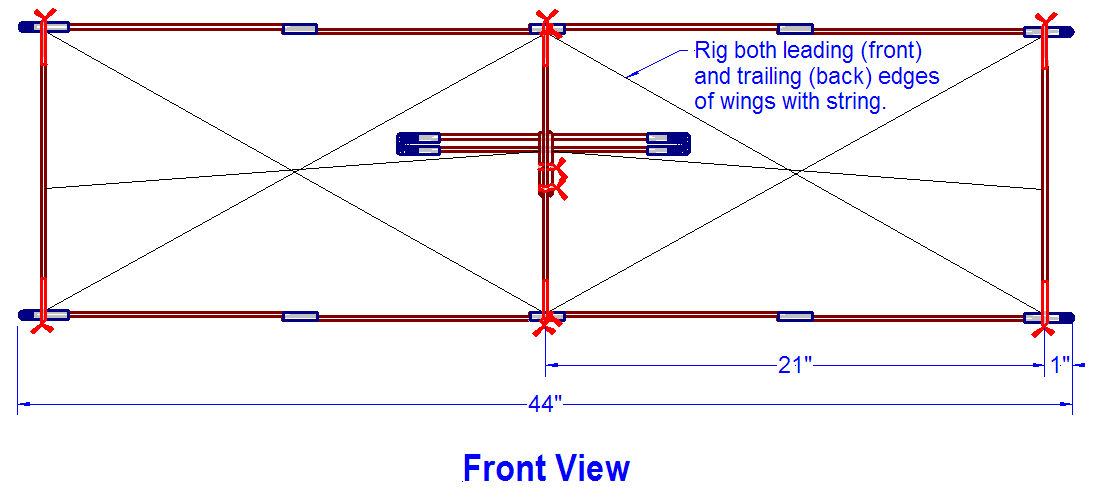
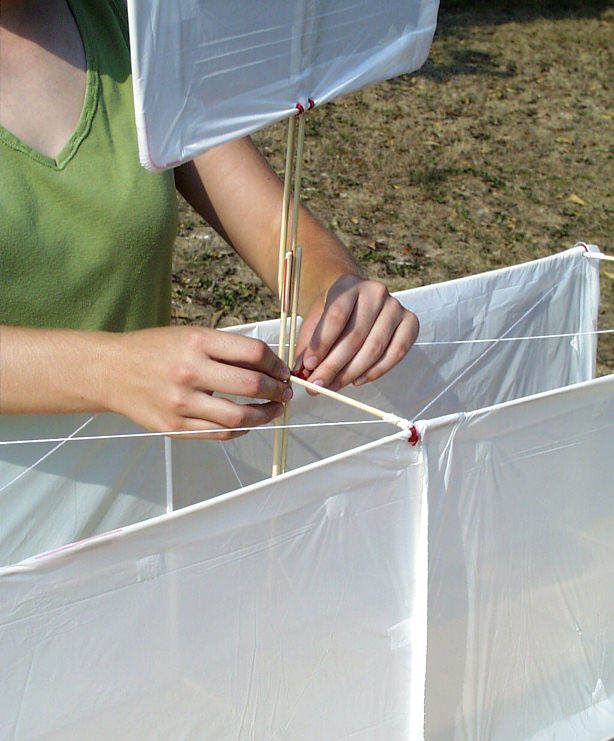
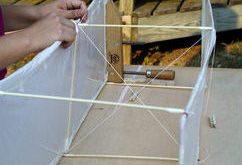
except for the wing tips. To make it rigid, you must brace or “rig”
the wings with kite string. Run two strings from the ends of the
center struts so they cross in the middle forming an “X.” Adjust
the length of the strings so the center struts and the ribs are
square to one another. Tie them tight, but not so tight that the
strings cause the skewers to bend.
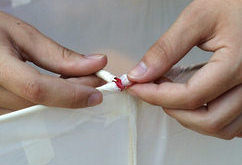
13. Rig the "bays"— the spaces between the struts at the
leading edge (front) and trailing edge (back) of the kite. The
strings should cross in the same manner you rigged the center of the
kite. Run the strings diagonally from the ends of the struts, forming two X’s as viewed from the
front or back. Adjust strings so the struts and spars remain square to one another.
Note: Do not rig the wing tips — The outboard
struts (at the corners of the wings) must be free to move. This
makes it possible for you to "warp” the wings.
|
Join the wings and struts by wrapping the ties on the ends of the
struts around the wing spars.
Attach the outboard struts (the struts at the corners of the wings)
about an inch in from each wing tip.
Along the span of the kite (wingtip to wingtip), the spaces between
the struts are called "bays." Rig each bay with string.
|
To do this, you must poke small holes in the wing covering on the
inside of the spars.
Rig the middle of the kite across the chord (edge to edge) with
string so the parts form a square. Don't rig the wing tips.
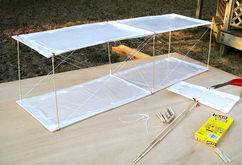
When rigged, the kite should hold a rectangular shape, but you
should still be able the flex it so the wings twist.
|
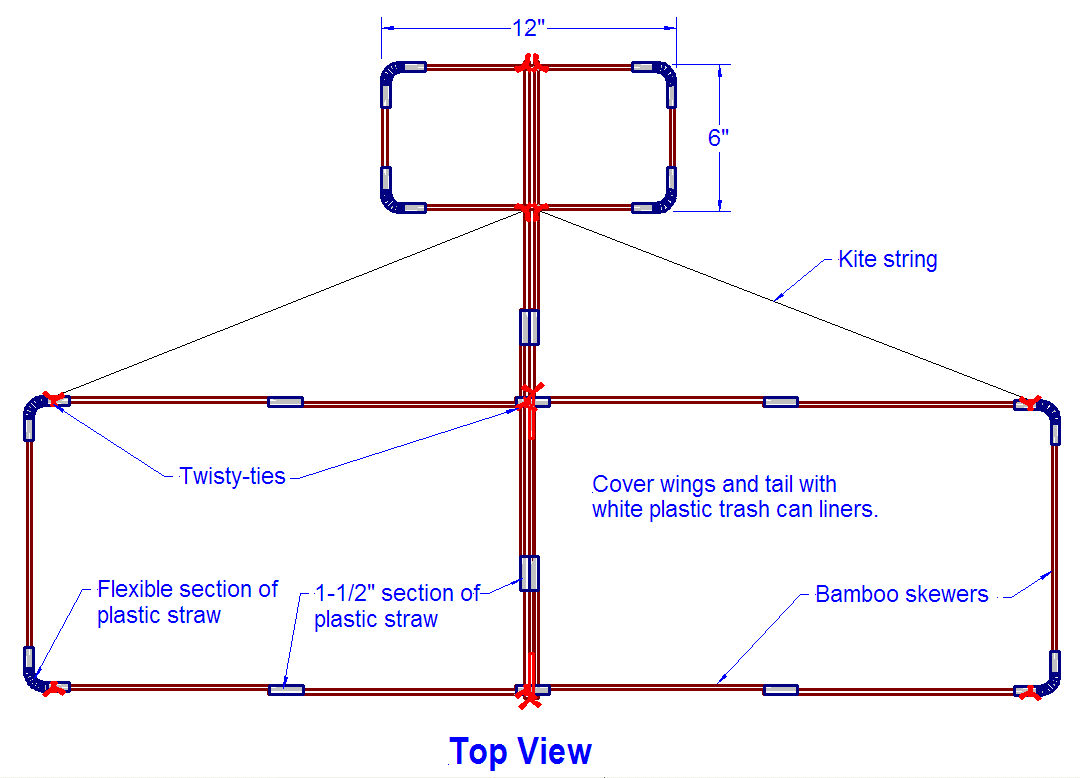
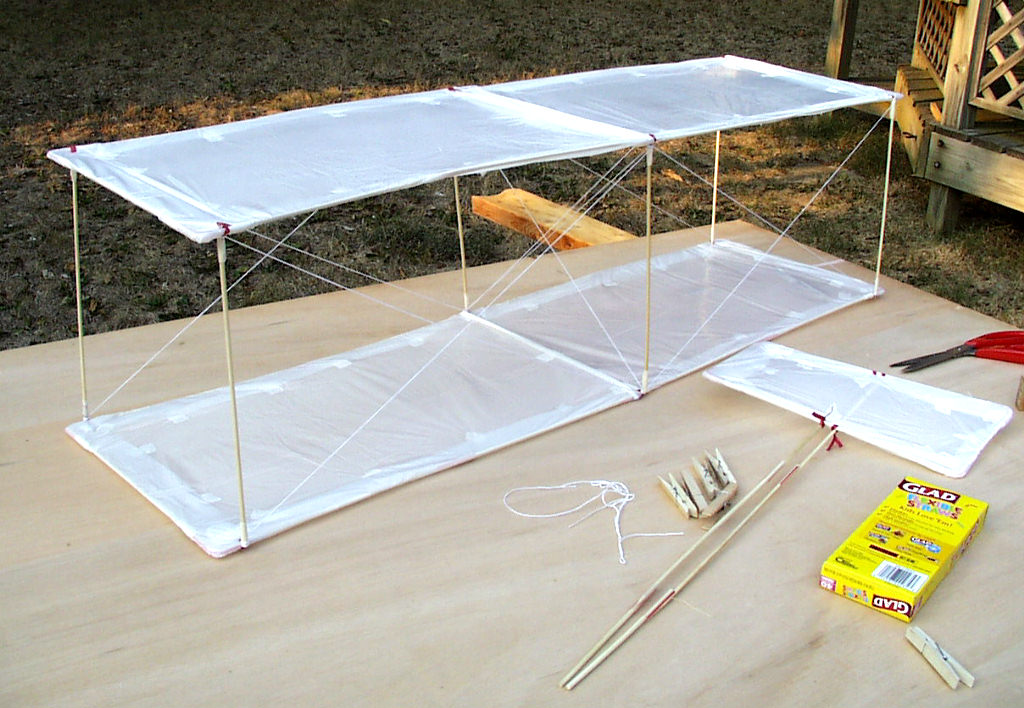
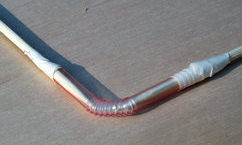
Assembling the tail
14. Lay the outriggers side by side and join the tail to them with
twisty-ties. Position the tail so it’s near one end of the
outriggers.
15. Spread the outriggers apart slightly and slide them
over the center struts, one outrigger on each side. Attach the
outriggers to the center struts with ties, then slide the outriggers
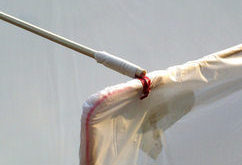
along the struts so the tail is angled up about 5 degrees. 16.
Rig the tail by running kite strings from the trailing struts to
the leading edge of the tail, as shown in the drawings.
|
(Above) Poke holes in the tail covering, then join the tail spars to
the outriggers with ties.
(Right) Attach the outriggers to the center struts and adjust
the tail so it's angled up at about 5 degrees. This prevents the
kite from diving suddenly.
|

|
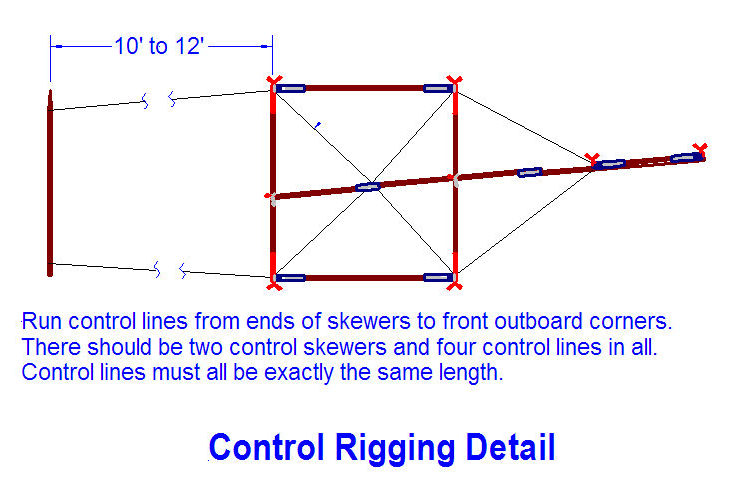
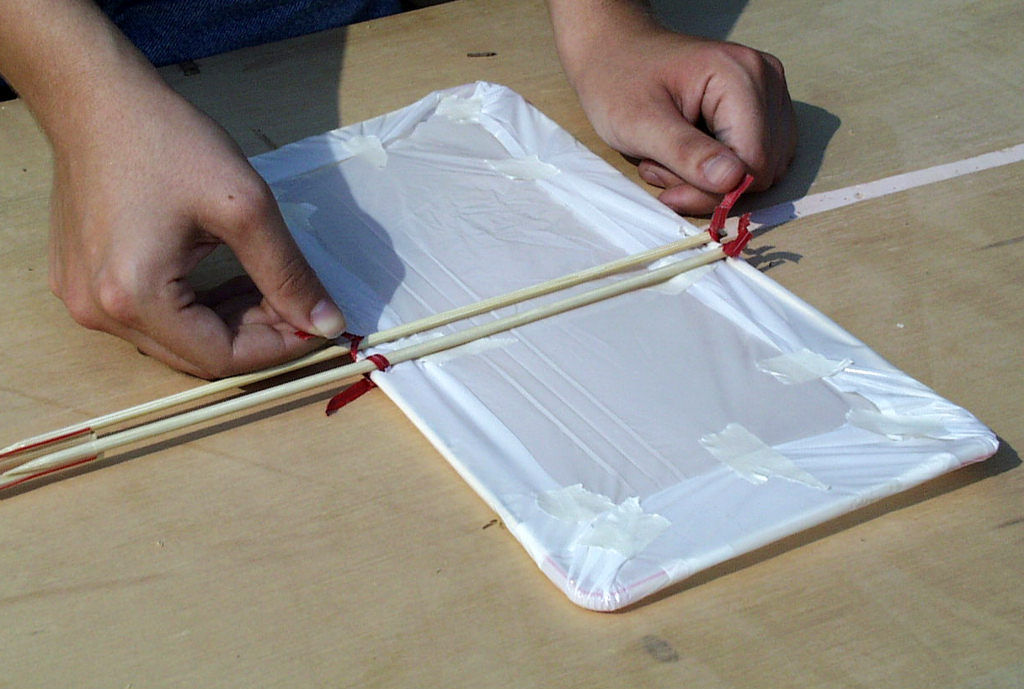
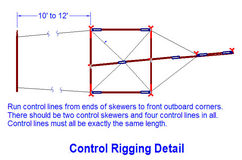
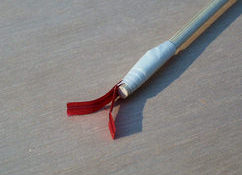
Attaching the control lines
17. You should have two skewers left. These will become your control
sticks. Cut four pieces of kite string 10 to 12 feet long. Make sure
all four pieces are exactly the same length.
18. Tie one end of each string to the end of a skewer and tape it in
place to keep it from sliding off. Attach the other end to one front
corners of the kite frame. One control stick should be attached to
the right side of the kite, the other to the left.
Note: You don’t want to make long strings for this kite. This
kite isn’t designed to fly high; it’s designed to be controlled.
When you move the control sticks, the front outer struts move
the same way. The longer the strings, the longer it will take for a
movement of the sticks to be “telegraphed” to the kite and move the
struts. This, in turn, will make the kite more difficult to control.
|
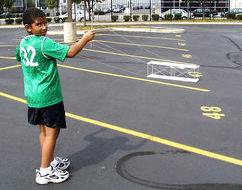
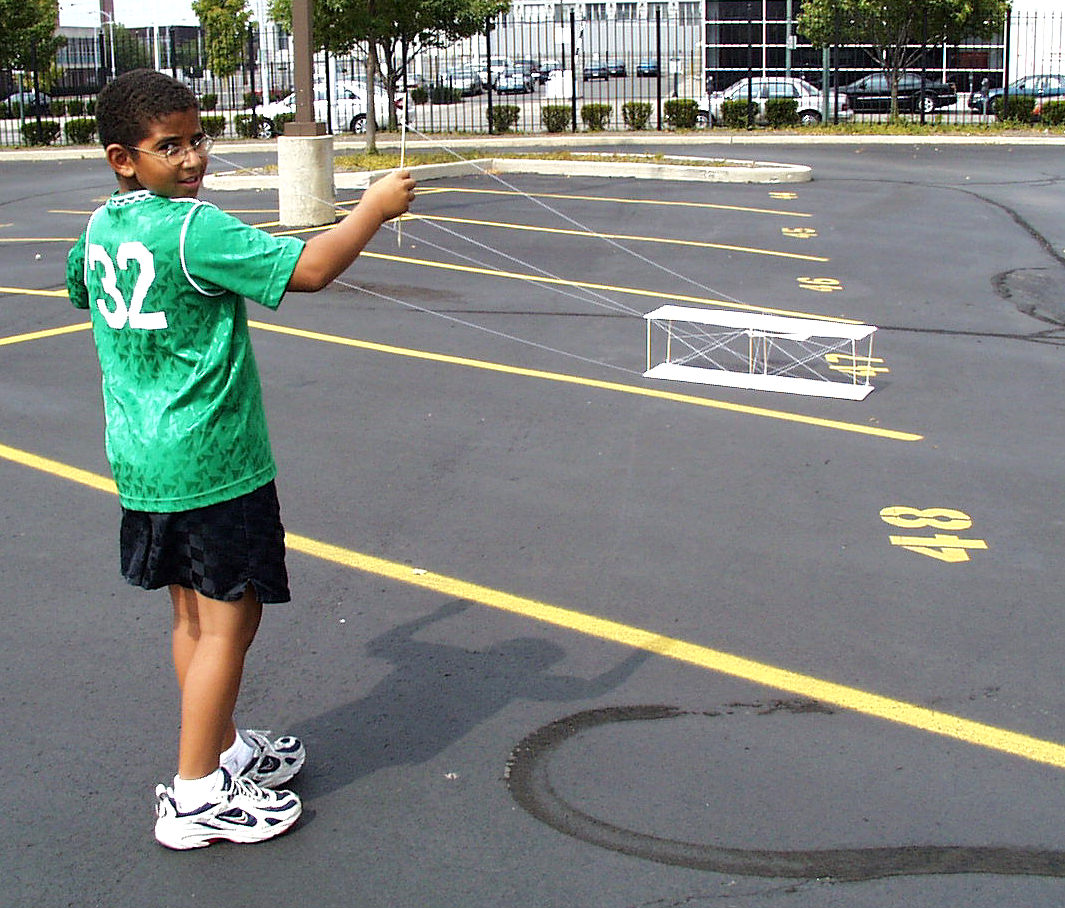
Get ready to launch the kite by placing it on the ground then
stepping back until the control strings are taut.
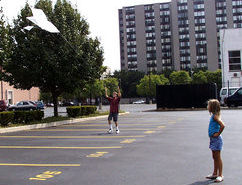
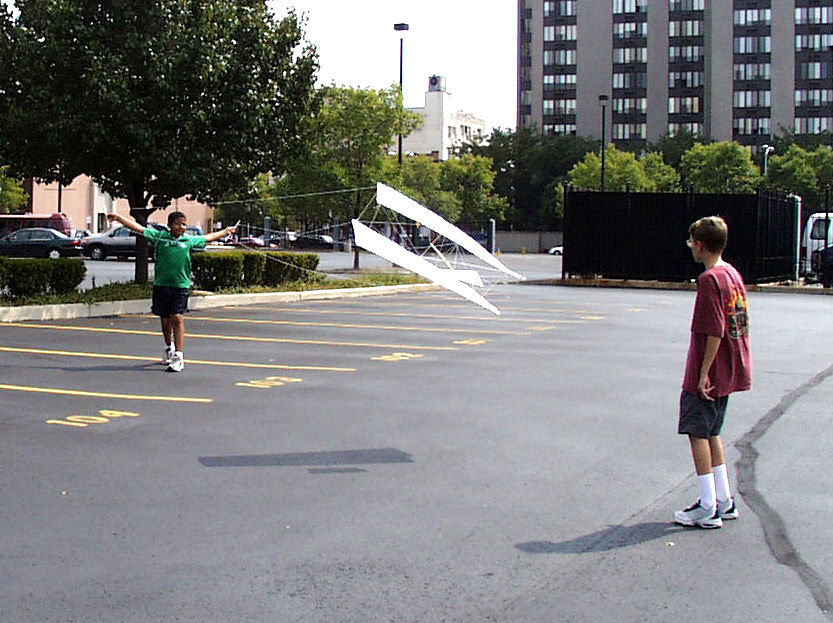
When it's flying, roll the kite left and right by angling the
control sticks in opposite directions.
|
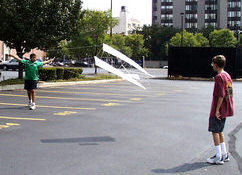
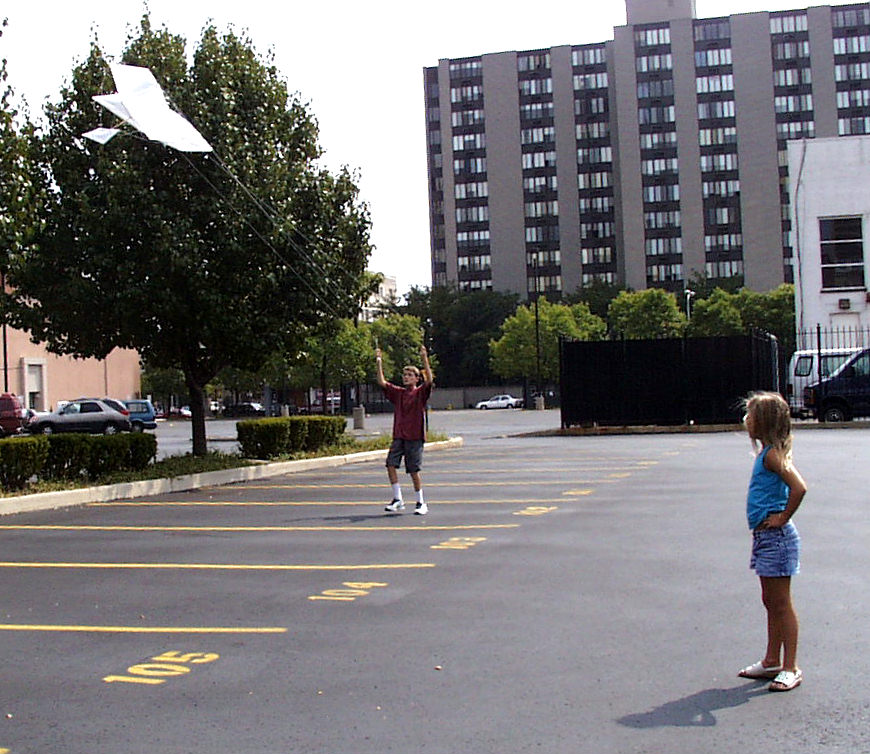
To launch the kite, quickly spread your arms, pulling on the kite.
Or you can take a few quick steps backwards. The wind must be at
your back.
|
|
|